Inspiration for Magnet Board
I liked this because I wanted the kids to have a fun place to play with magnets in the playroom, and thought it was neat to decorate the magnet board with whatever fabric you like. This also turned out to be cheaper than buying an assembled magnet board/white board from Target. The same size magnetic whiteboard at Target was $12.99 per board. I made two for $17 and mine are way cuter.
Materials:
- Piece of sheet metal
- Fabric large enough to cover the sheet metal
- Spray adhesive
- Wall mounts
- Scissors
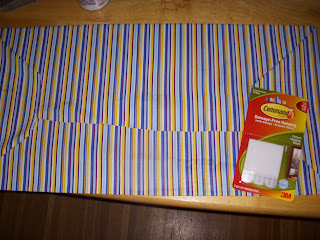
The fabric we bought on sale at Joanne's. I picked from the bargain bin, and probably could have made better color/pattern selections, but I had both kids and not a lot of time, so I just grabbed these two patterns, which were $1 per yard. I ended up only needing a little over .5 a yard of fabric for the sheet metal I purchased, even though I bought 3 times that much. But better to have too much than too little.
I already had spray adhesive and scissors at home, but the spray adhesive I used is only a few dollars for the whole can, which you only need a small amount of for this project. Once I had everything home, I got to work!
 |
| Wrapping the sheet metal in fabric. |
 |
| The back of the board with the wall mounts I used to hang it. |
 |
| The magnet board mounted on the wall. |
And that was it! A few bucks and a few minutes and I had custom made magnet boards for the kids in the playroom!
Total cost: Between $7-$20 per board, depending on how big the board you want and how much the fabric you use costs. The total for my two boards that are 12"x24" and covered in the above pictured fabric was $17 (although I already has spray adhesive, so that's not totaled into that cost and I bought most of the materials on sale/with coupons)
Total time: Once I had all the materials, it took me about 10 minutes to make and mount both boards. We just made them, so I'm not sure how much the kids will use them, but so far they're enjoying them quite a bit!
Result: Pretty sweet!
I'll make a post tomorrow about how we made the awesome magnets and the accessories you can add.
 |
| Wyatt is pretty impressed with his board. |
 | ||||
| Emma plays with the magnets. |
No comments:
Post a Comment